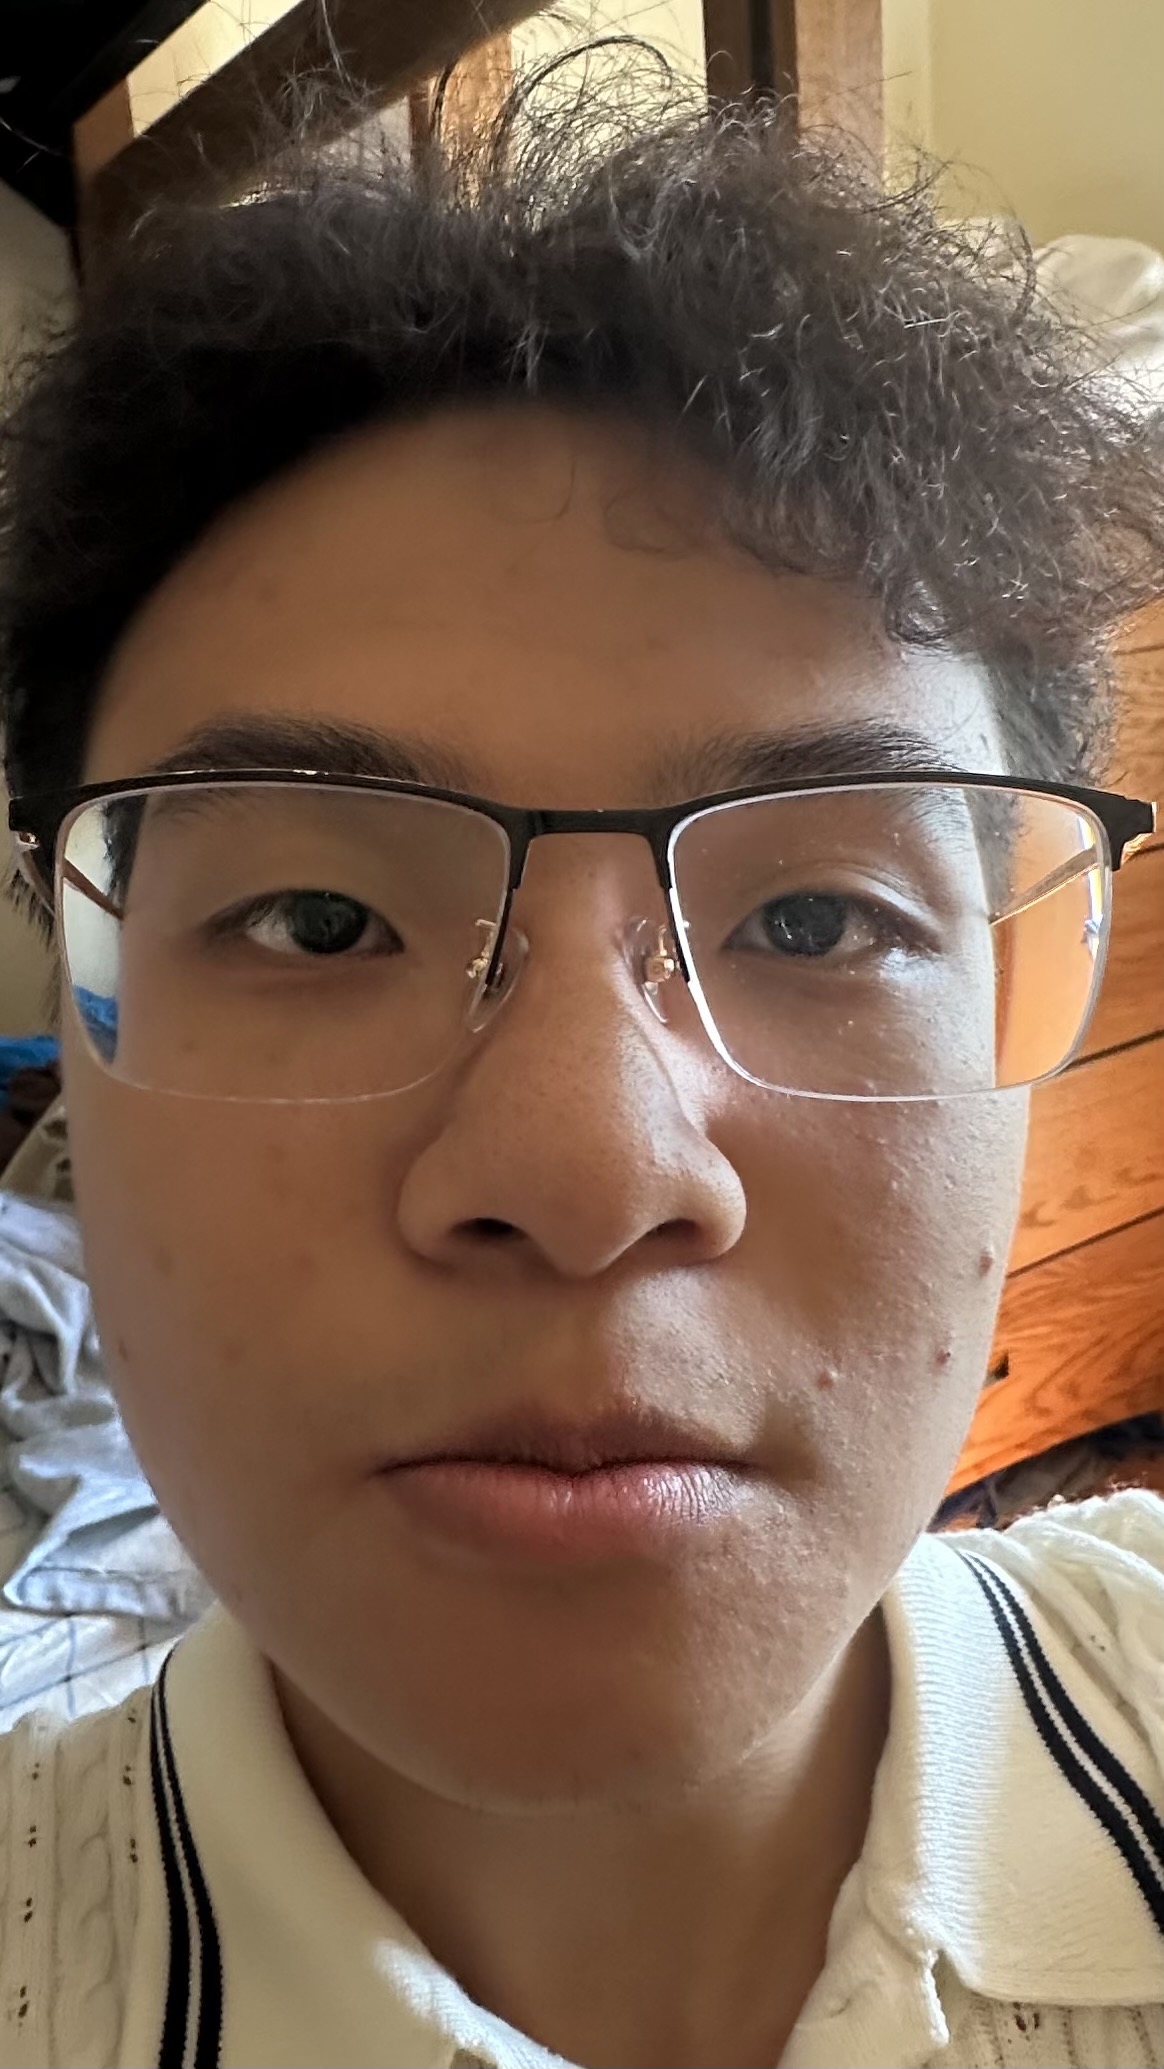
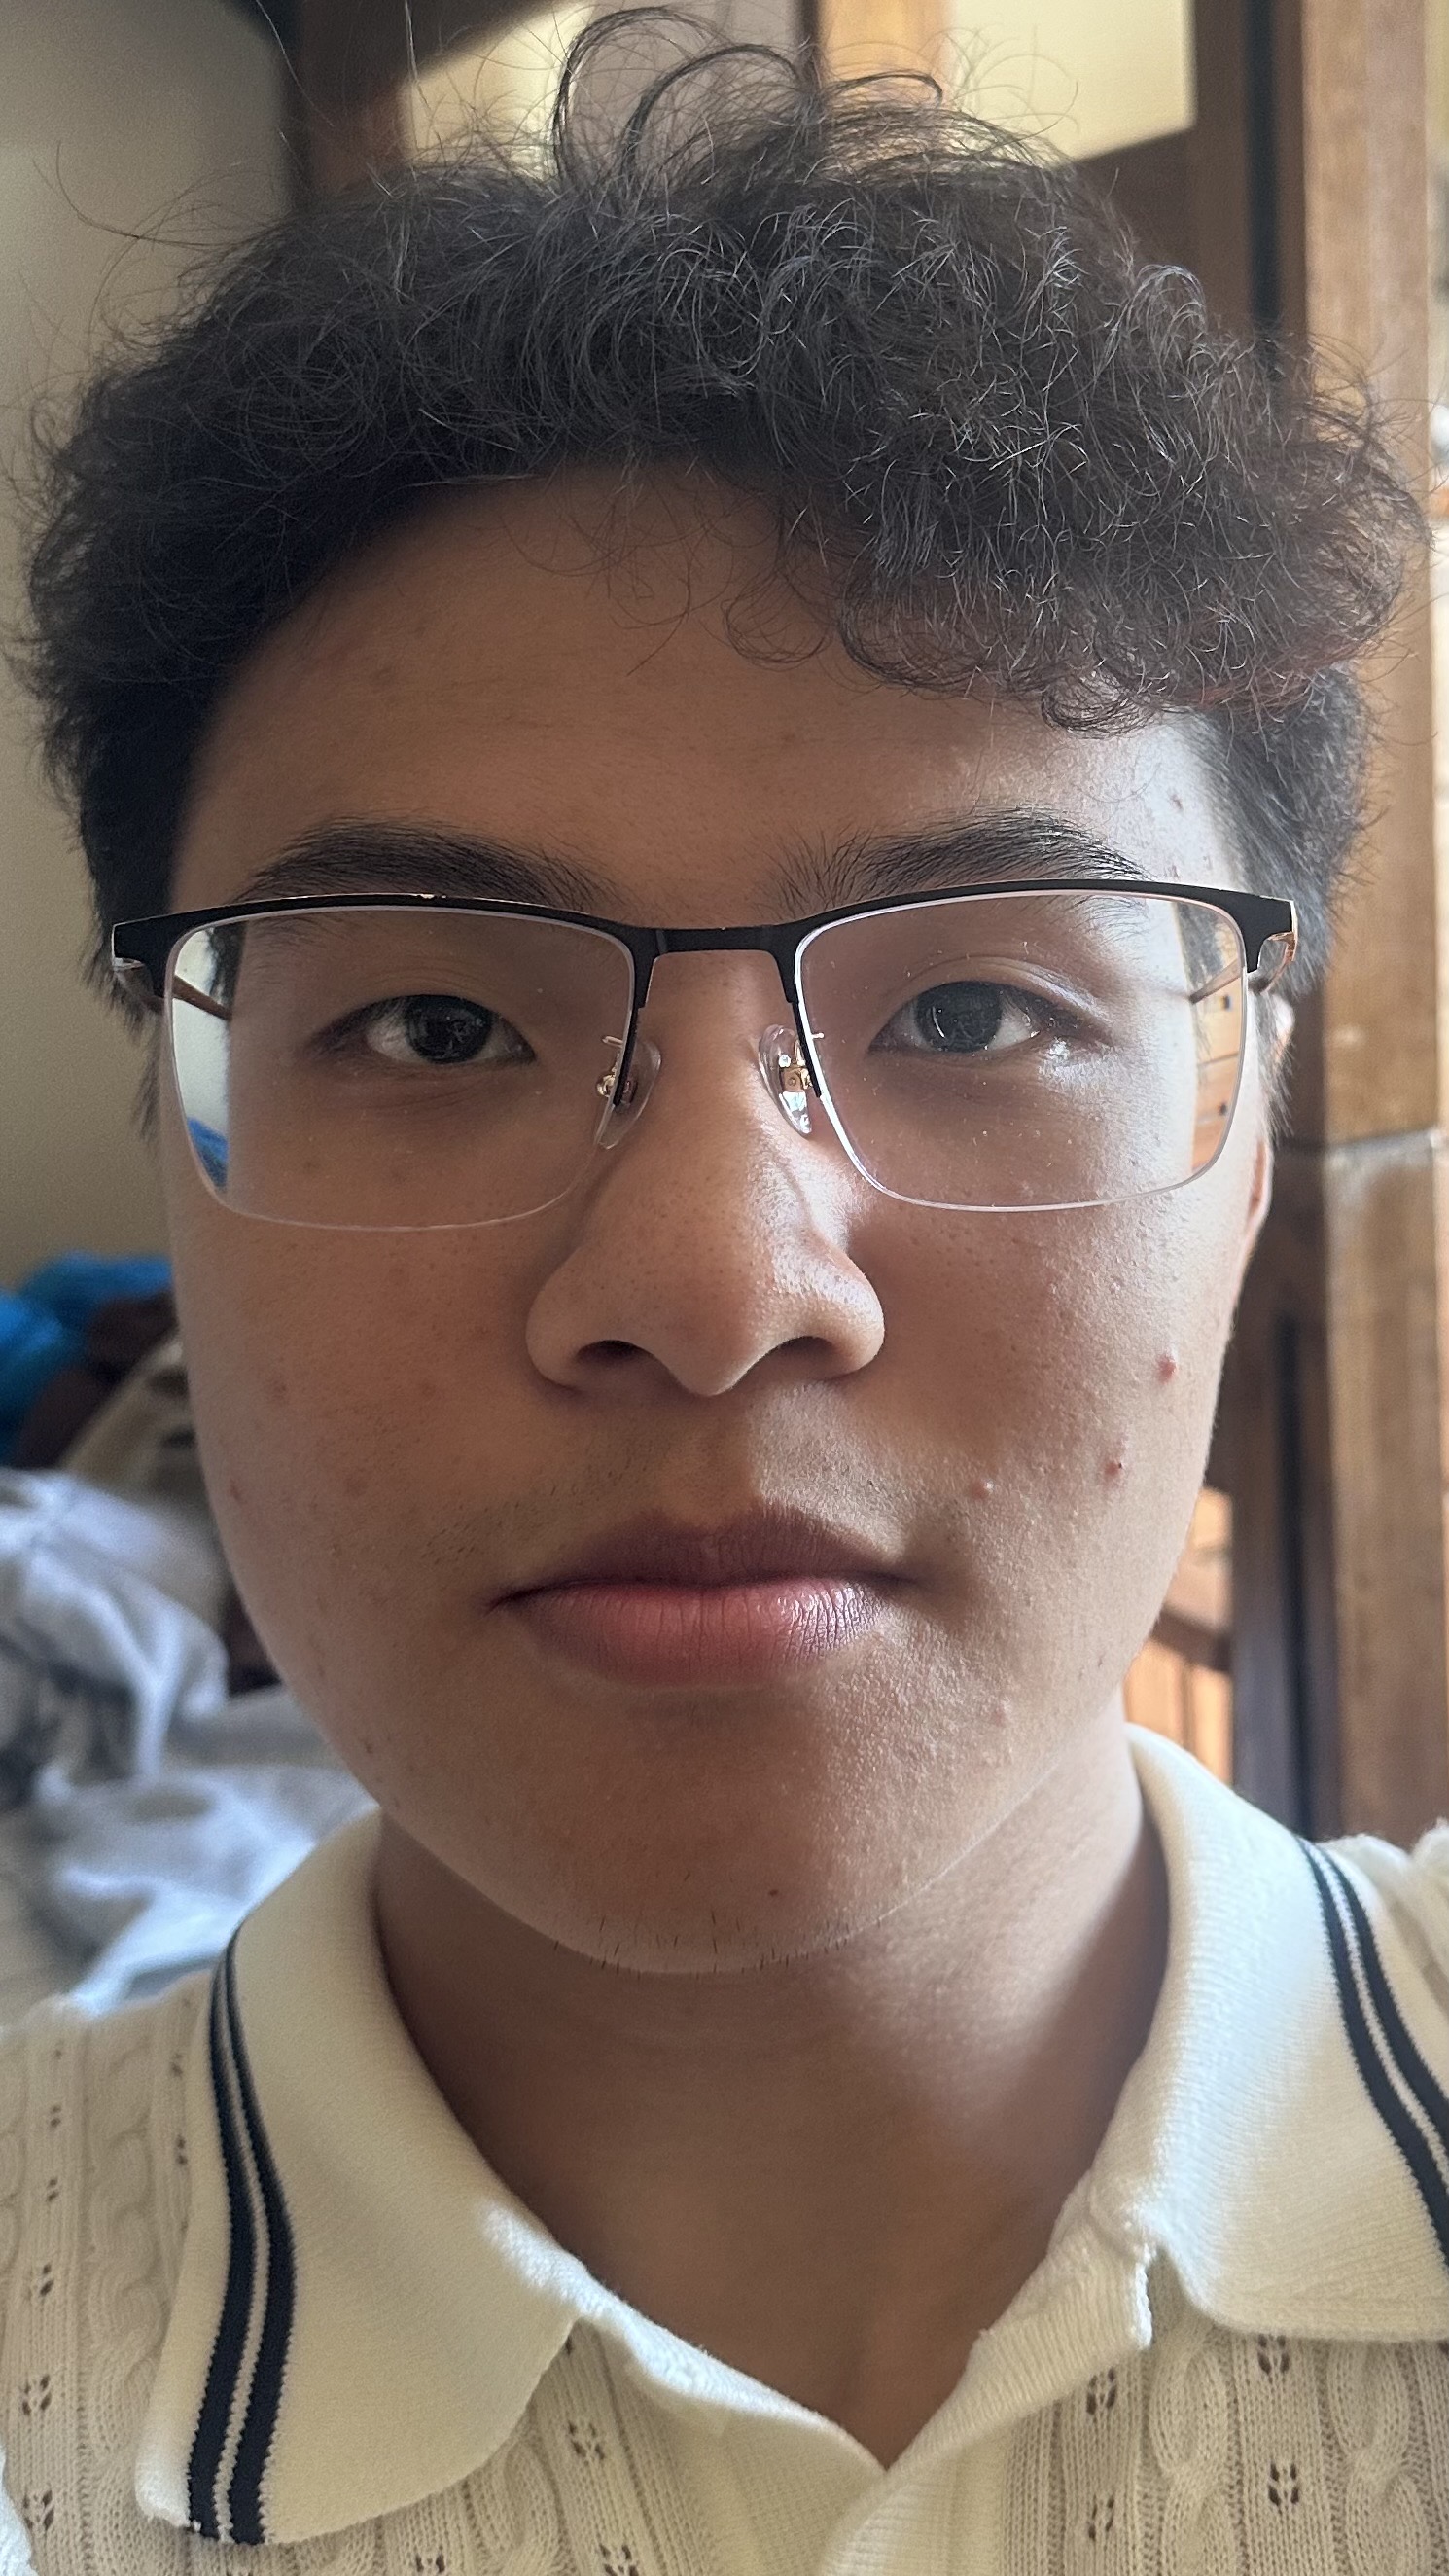
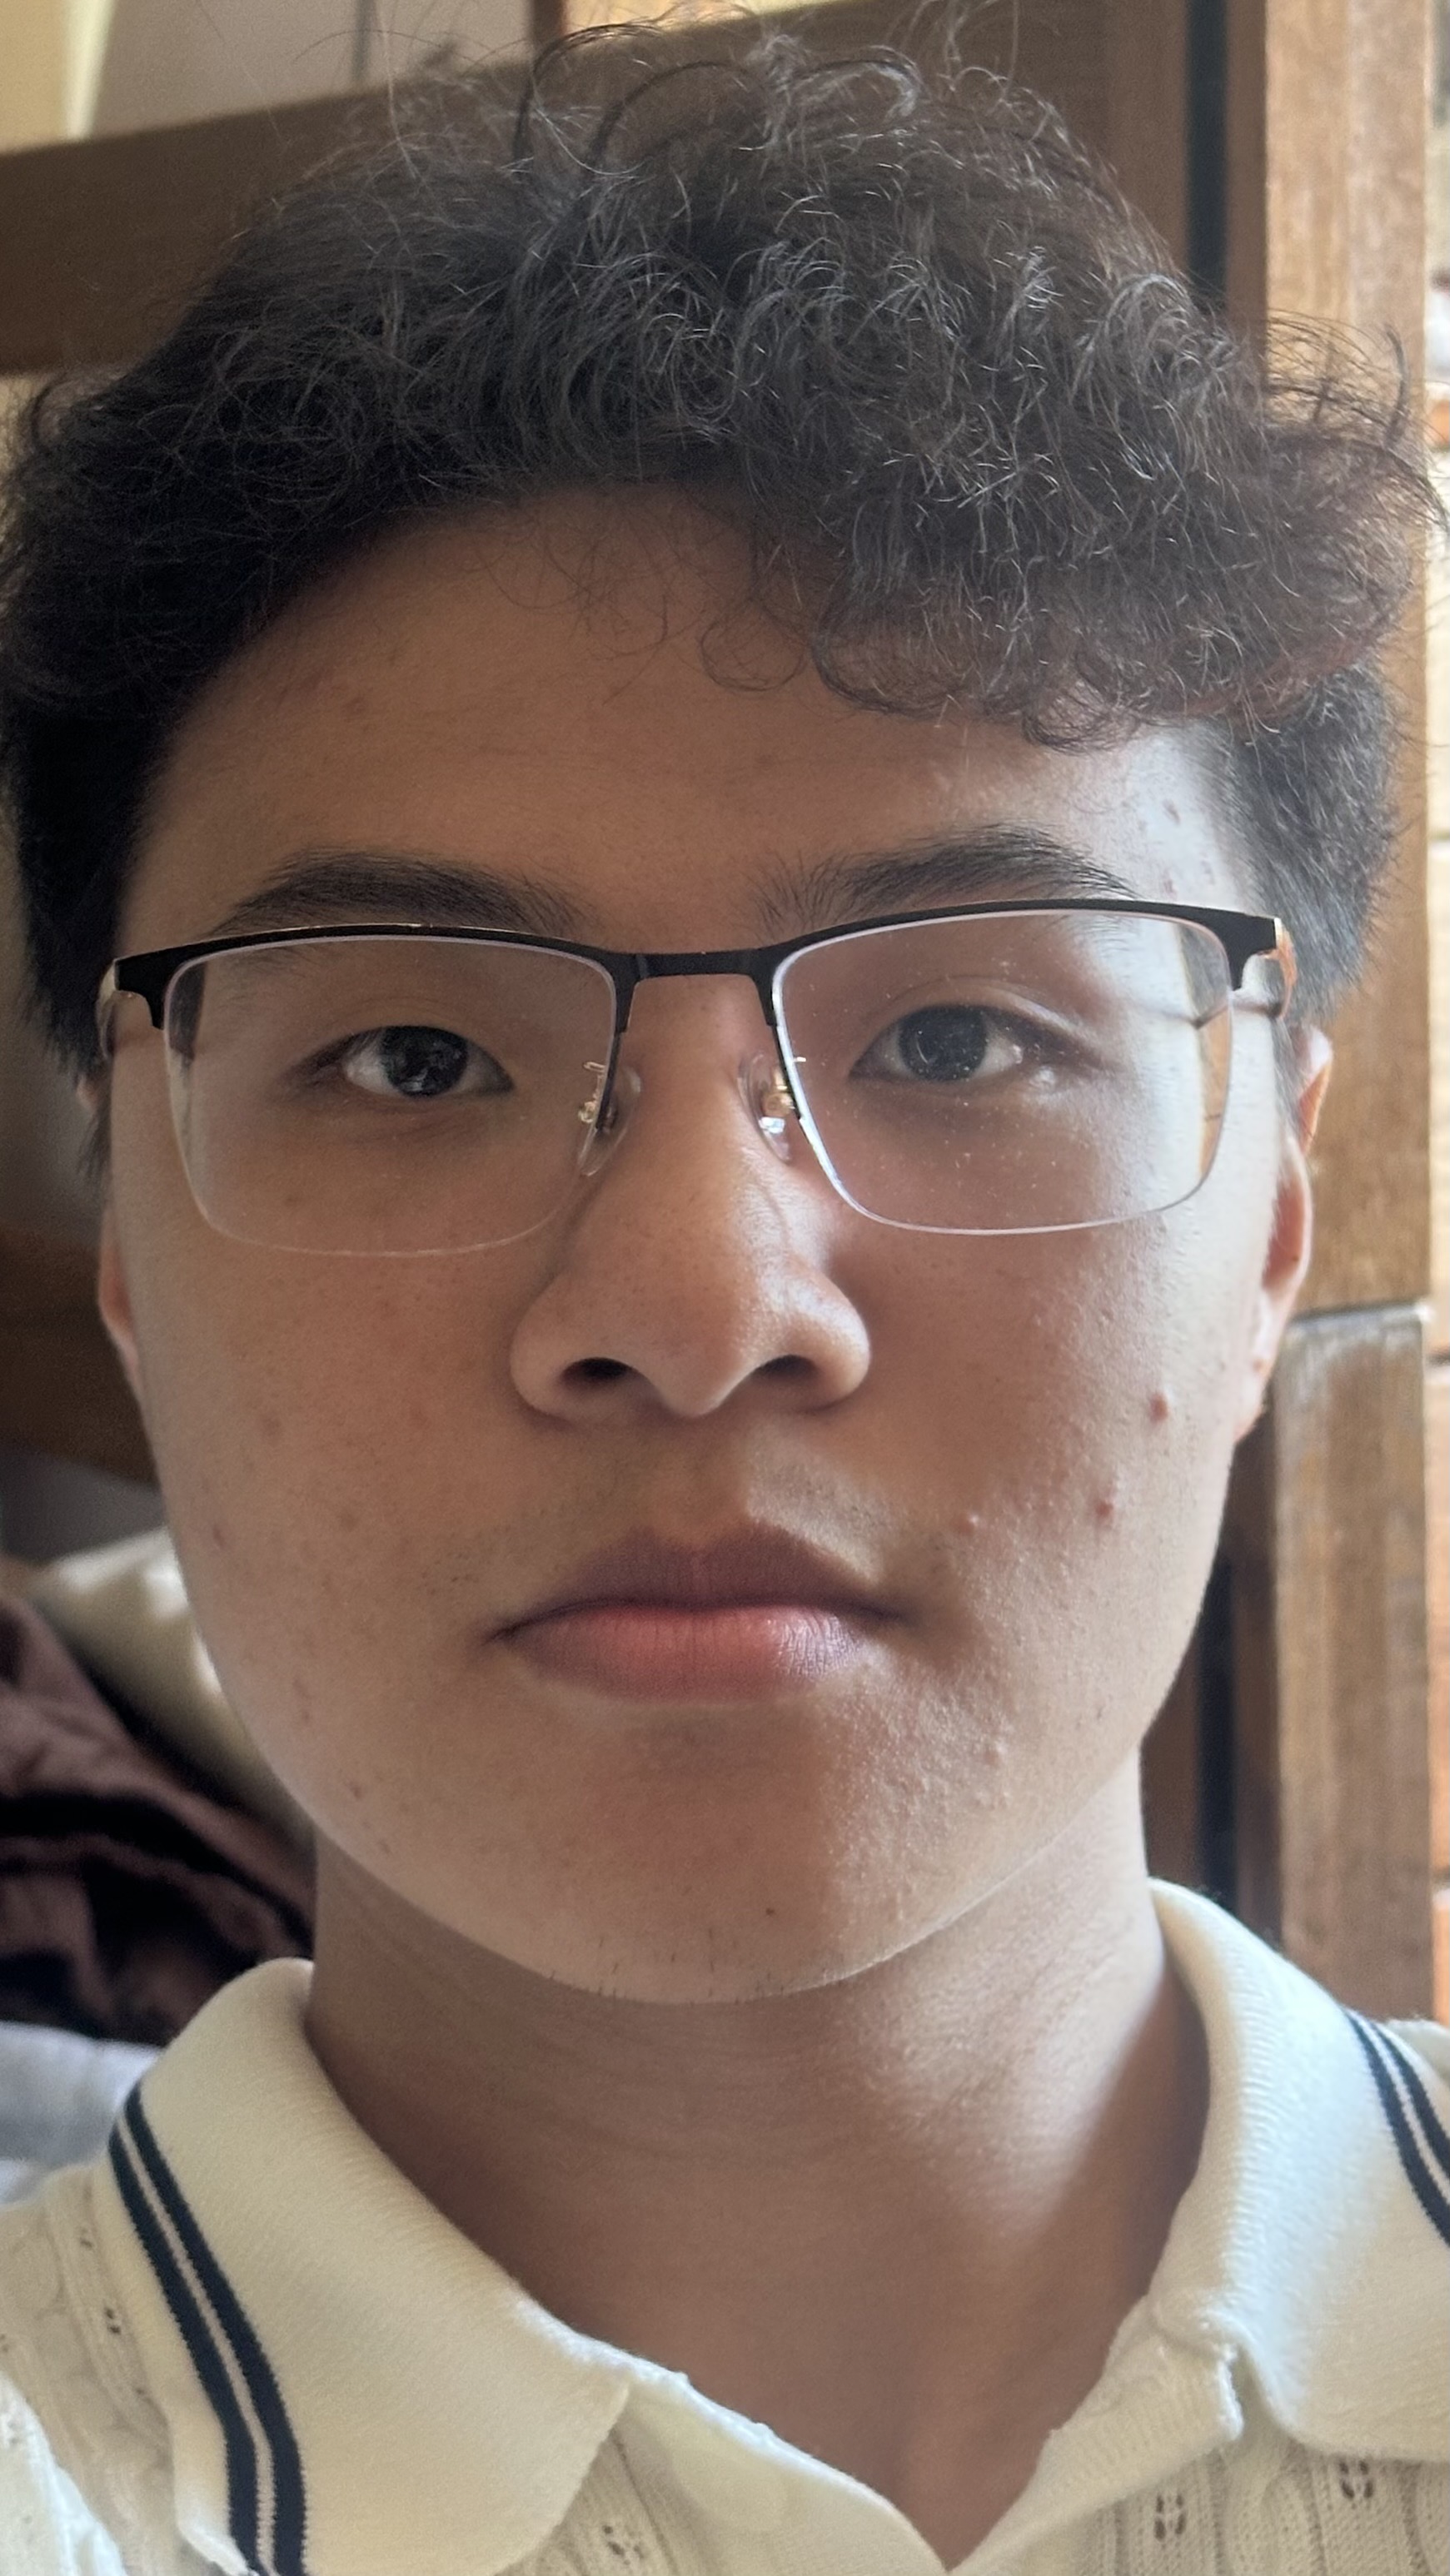
Selfie: The Wrong Way vs. The Right Way
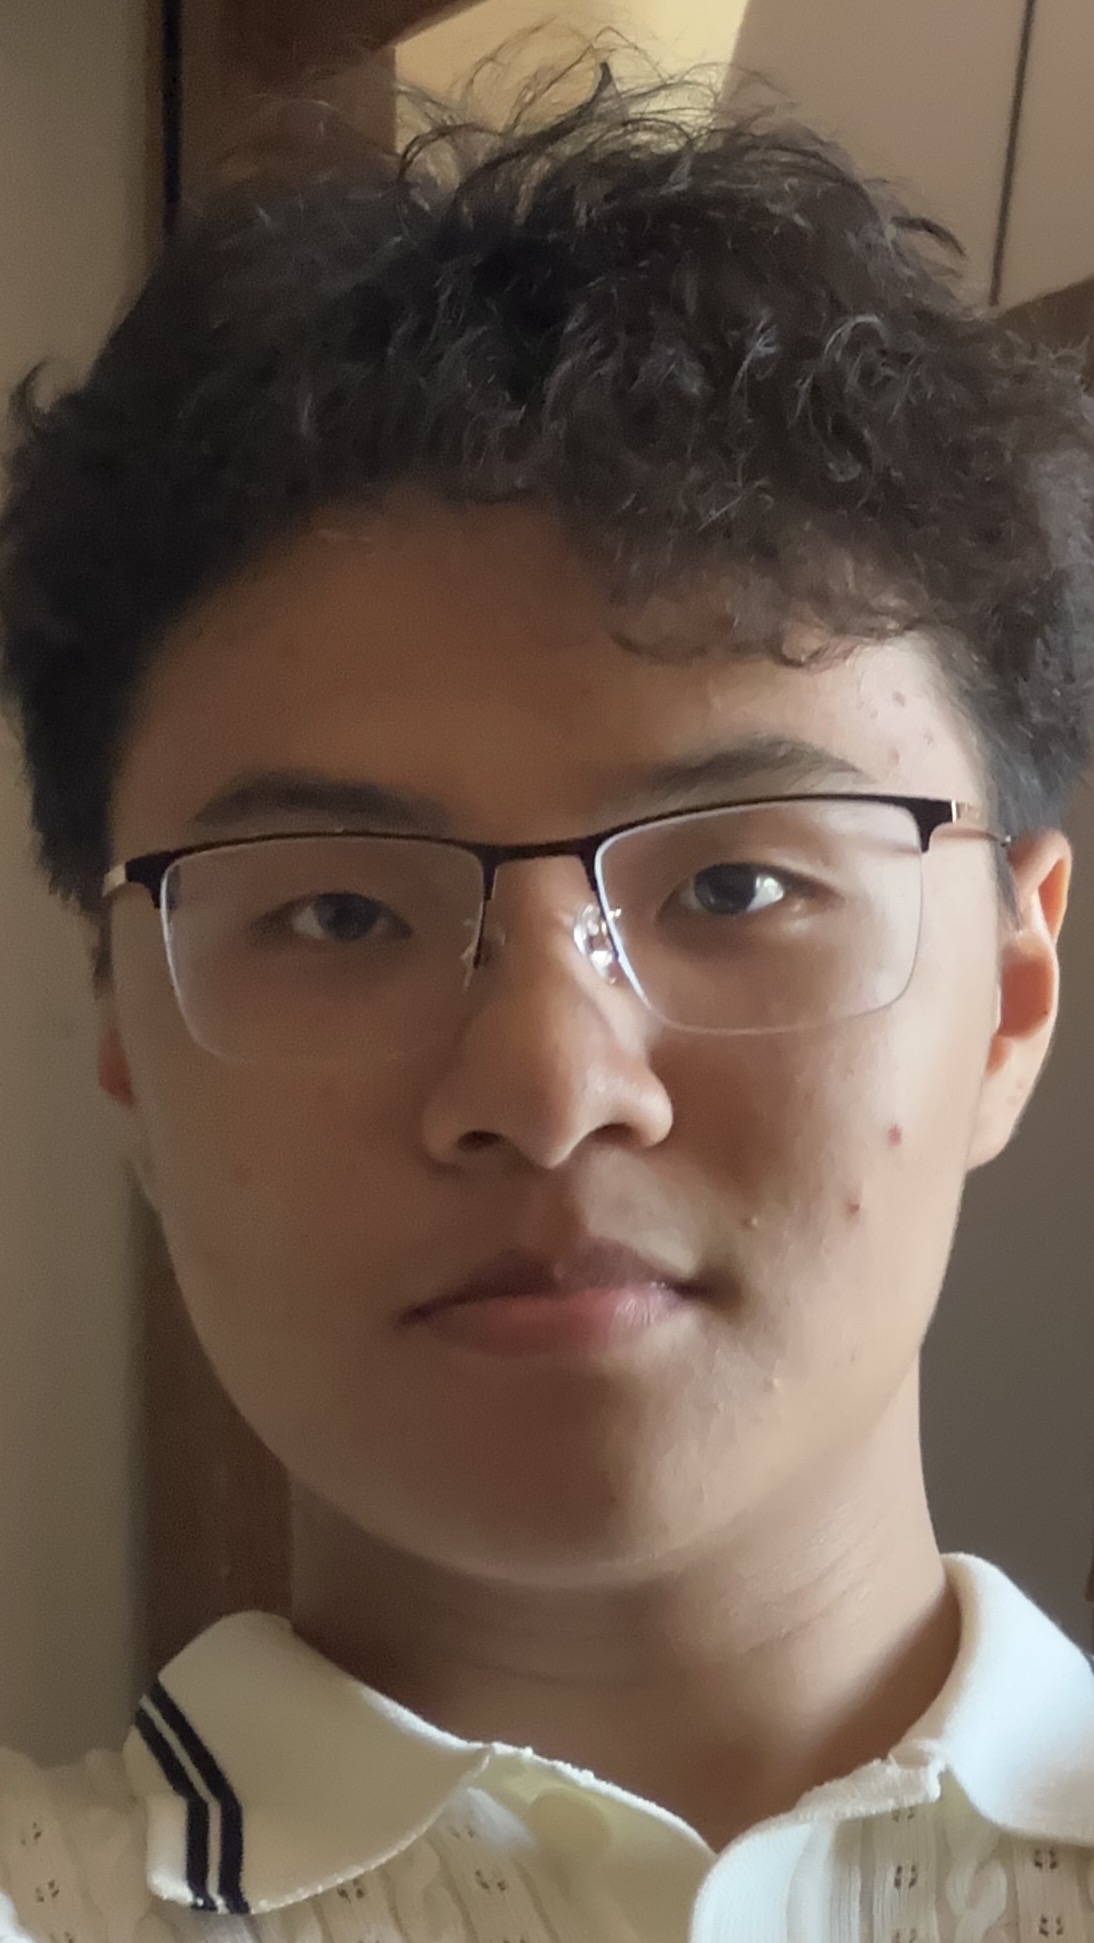
As shown in the pictures below, these are all photos of me taken with different lenses on an iPhone 14 Pro. We can observe that the wide-angle lens (0.5x) creates more facial distortion, making the face appear less natural. As we use longer focal lengths, the facial contours appear more natural and dimensional.
Why does this happen? When we take a photograph, we're converting a 3D scene into a 2D image. The perspective distortion occurs because of the distance between the camera and subject. You can visualize this by drawing a triangle - when the subject is farther from the lens, the light rays entering the lens are more parallel, creating a more natural perspective similar to how we perceive depth.
Interestingly, the human eye has a focal length of approximately 50mm (in full-frame equivalent terms), which is why a 2x zoom on iPhone often produces the best photo.
P.S. I personally prefer the 2x lens on iPhone for food photography on Instagram stories, and I often use a 50mm lens on my film camera!.
Architectural Perspective Compression
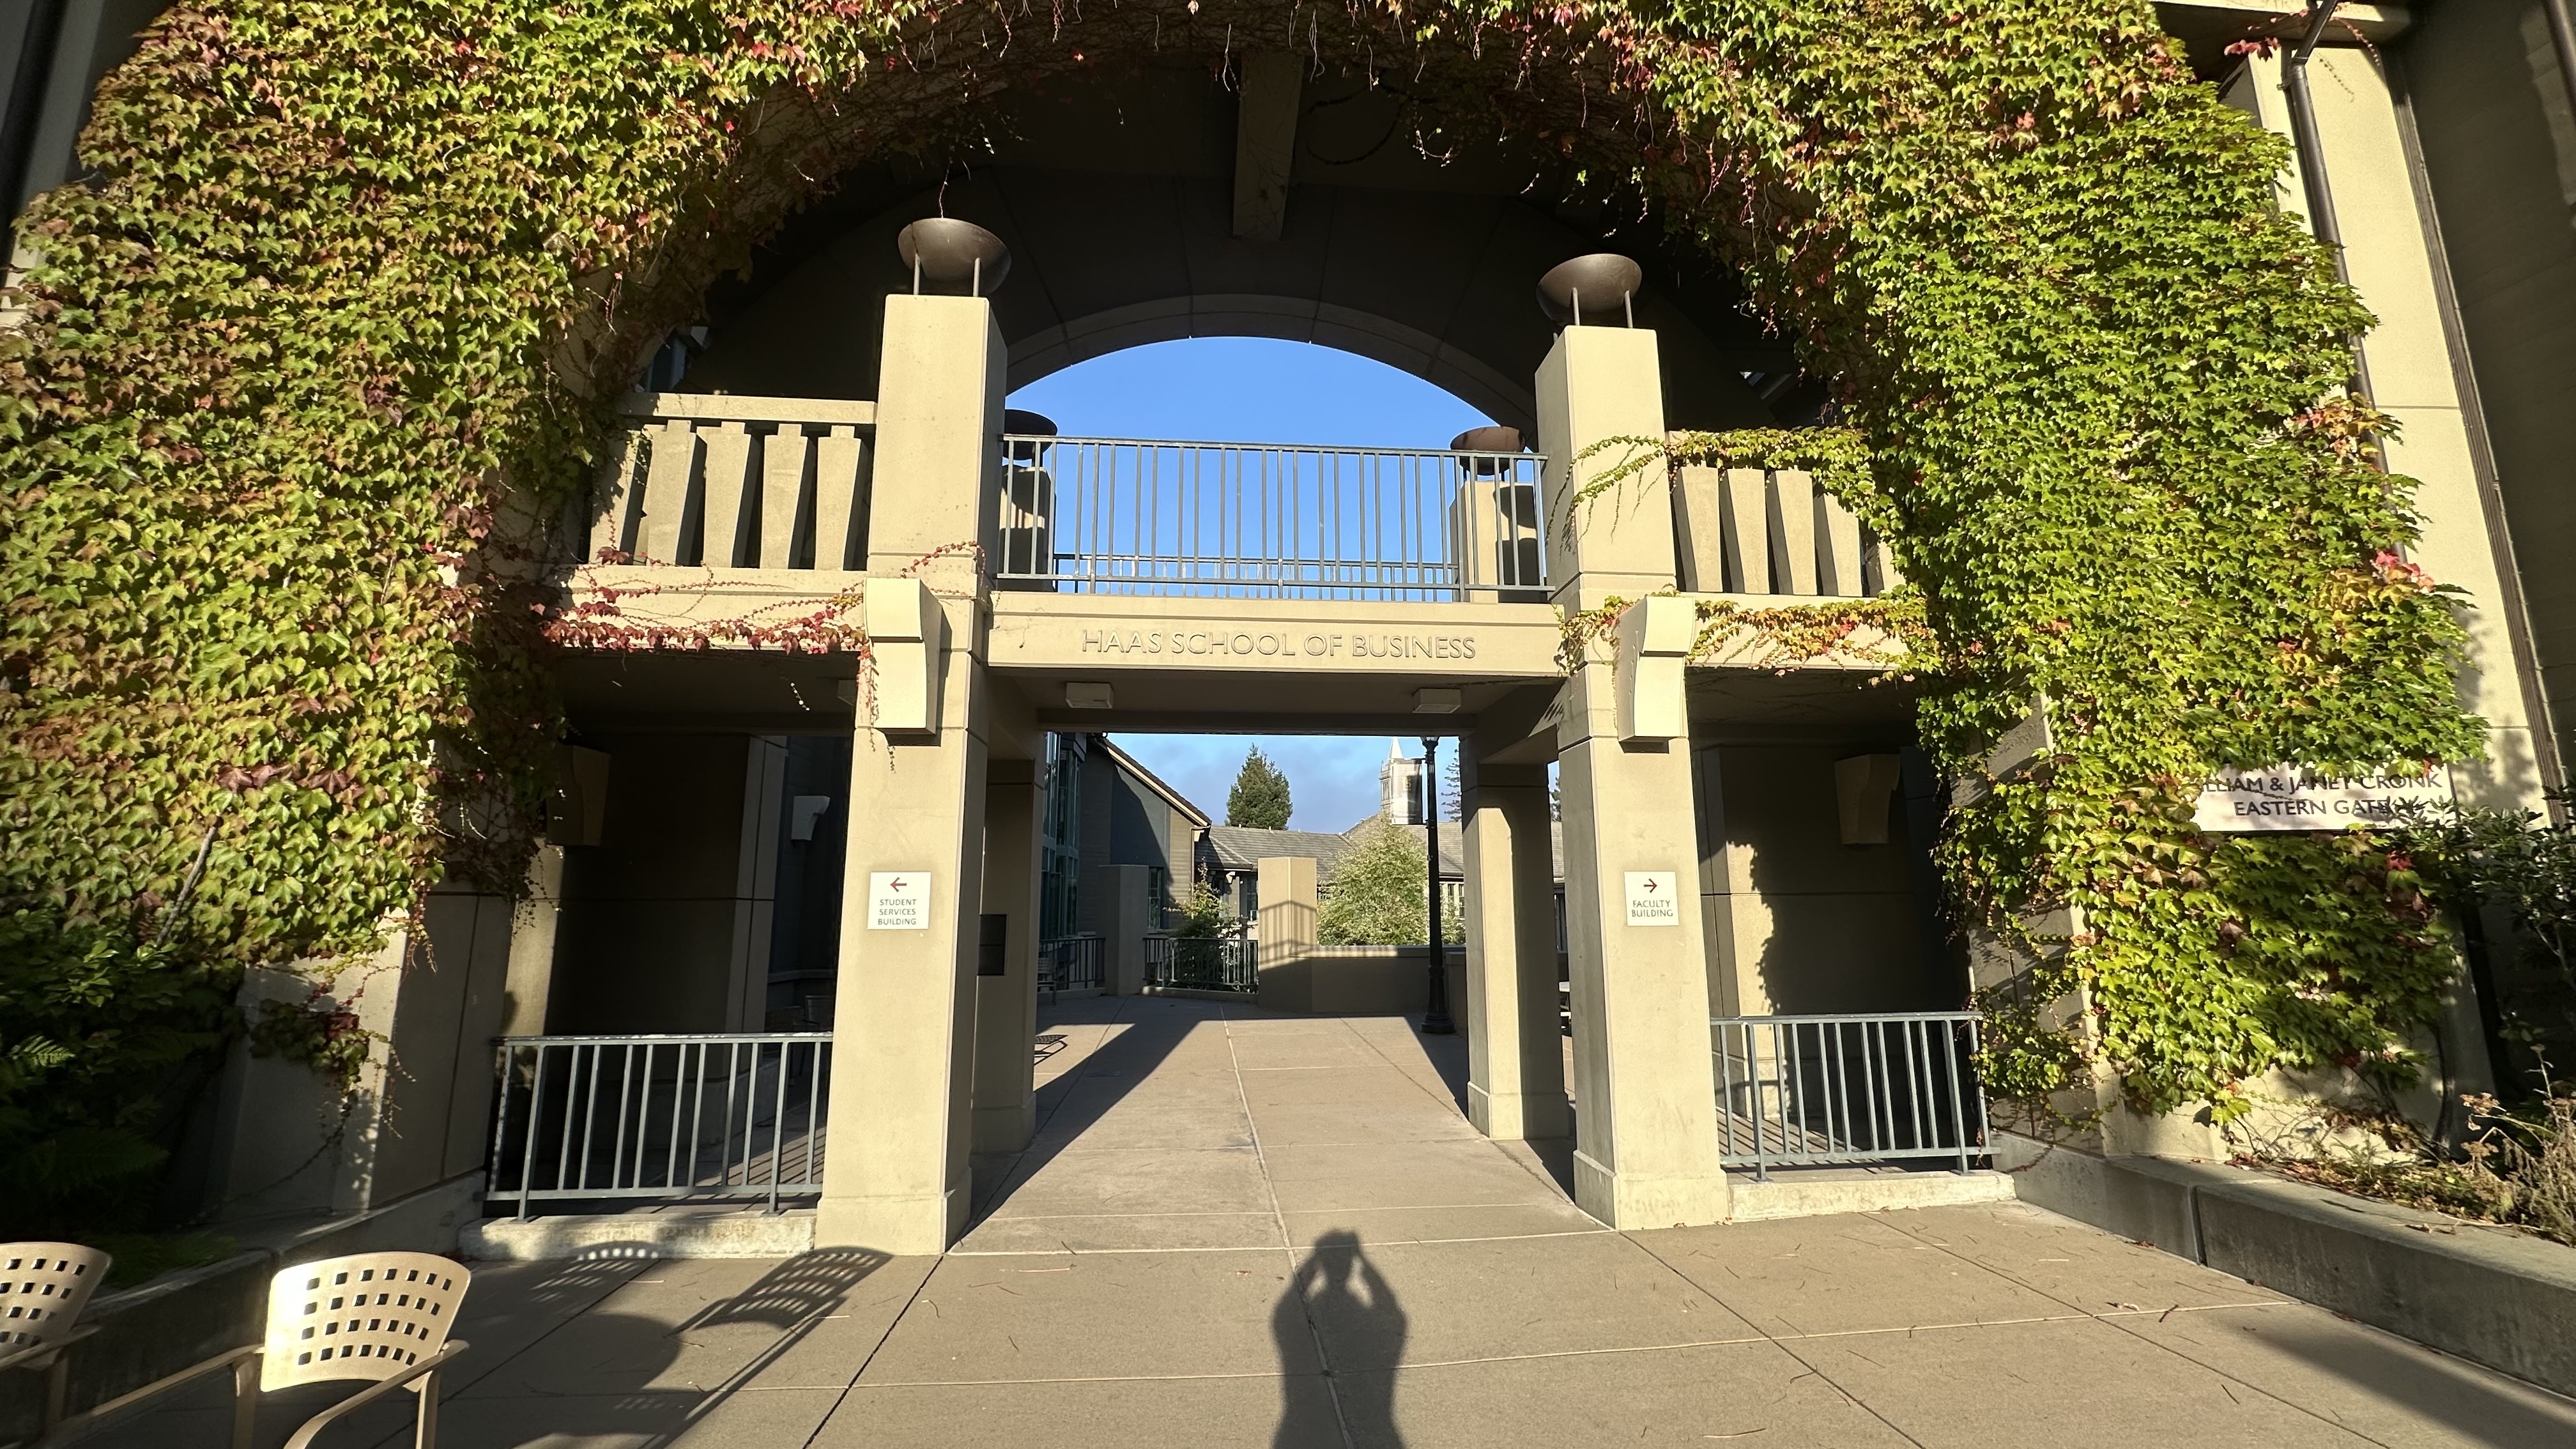
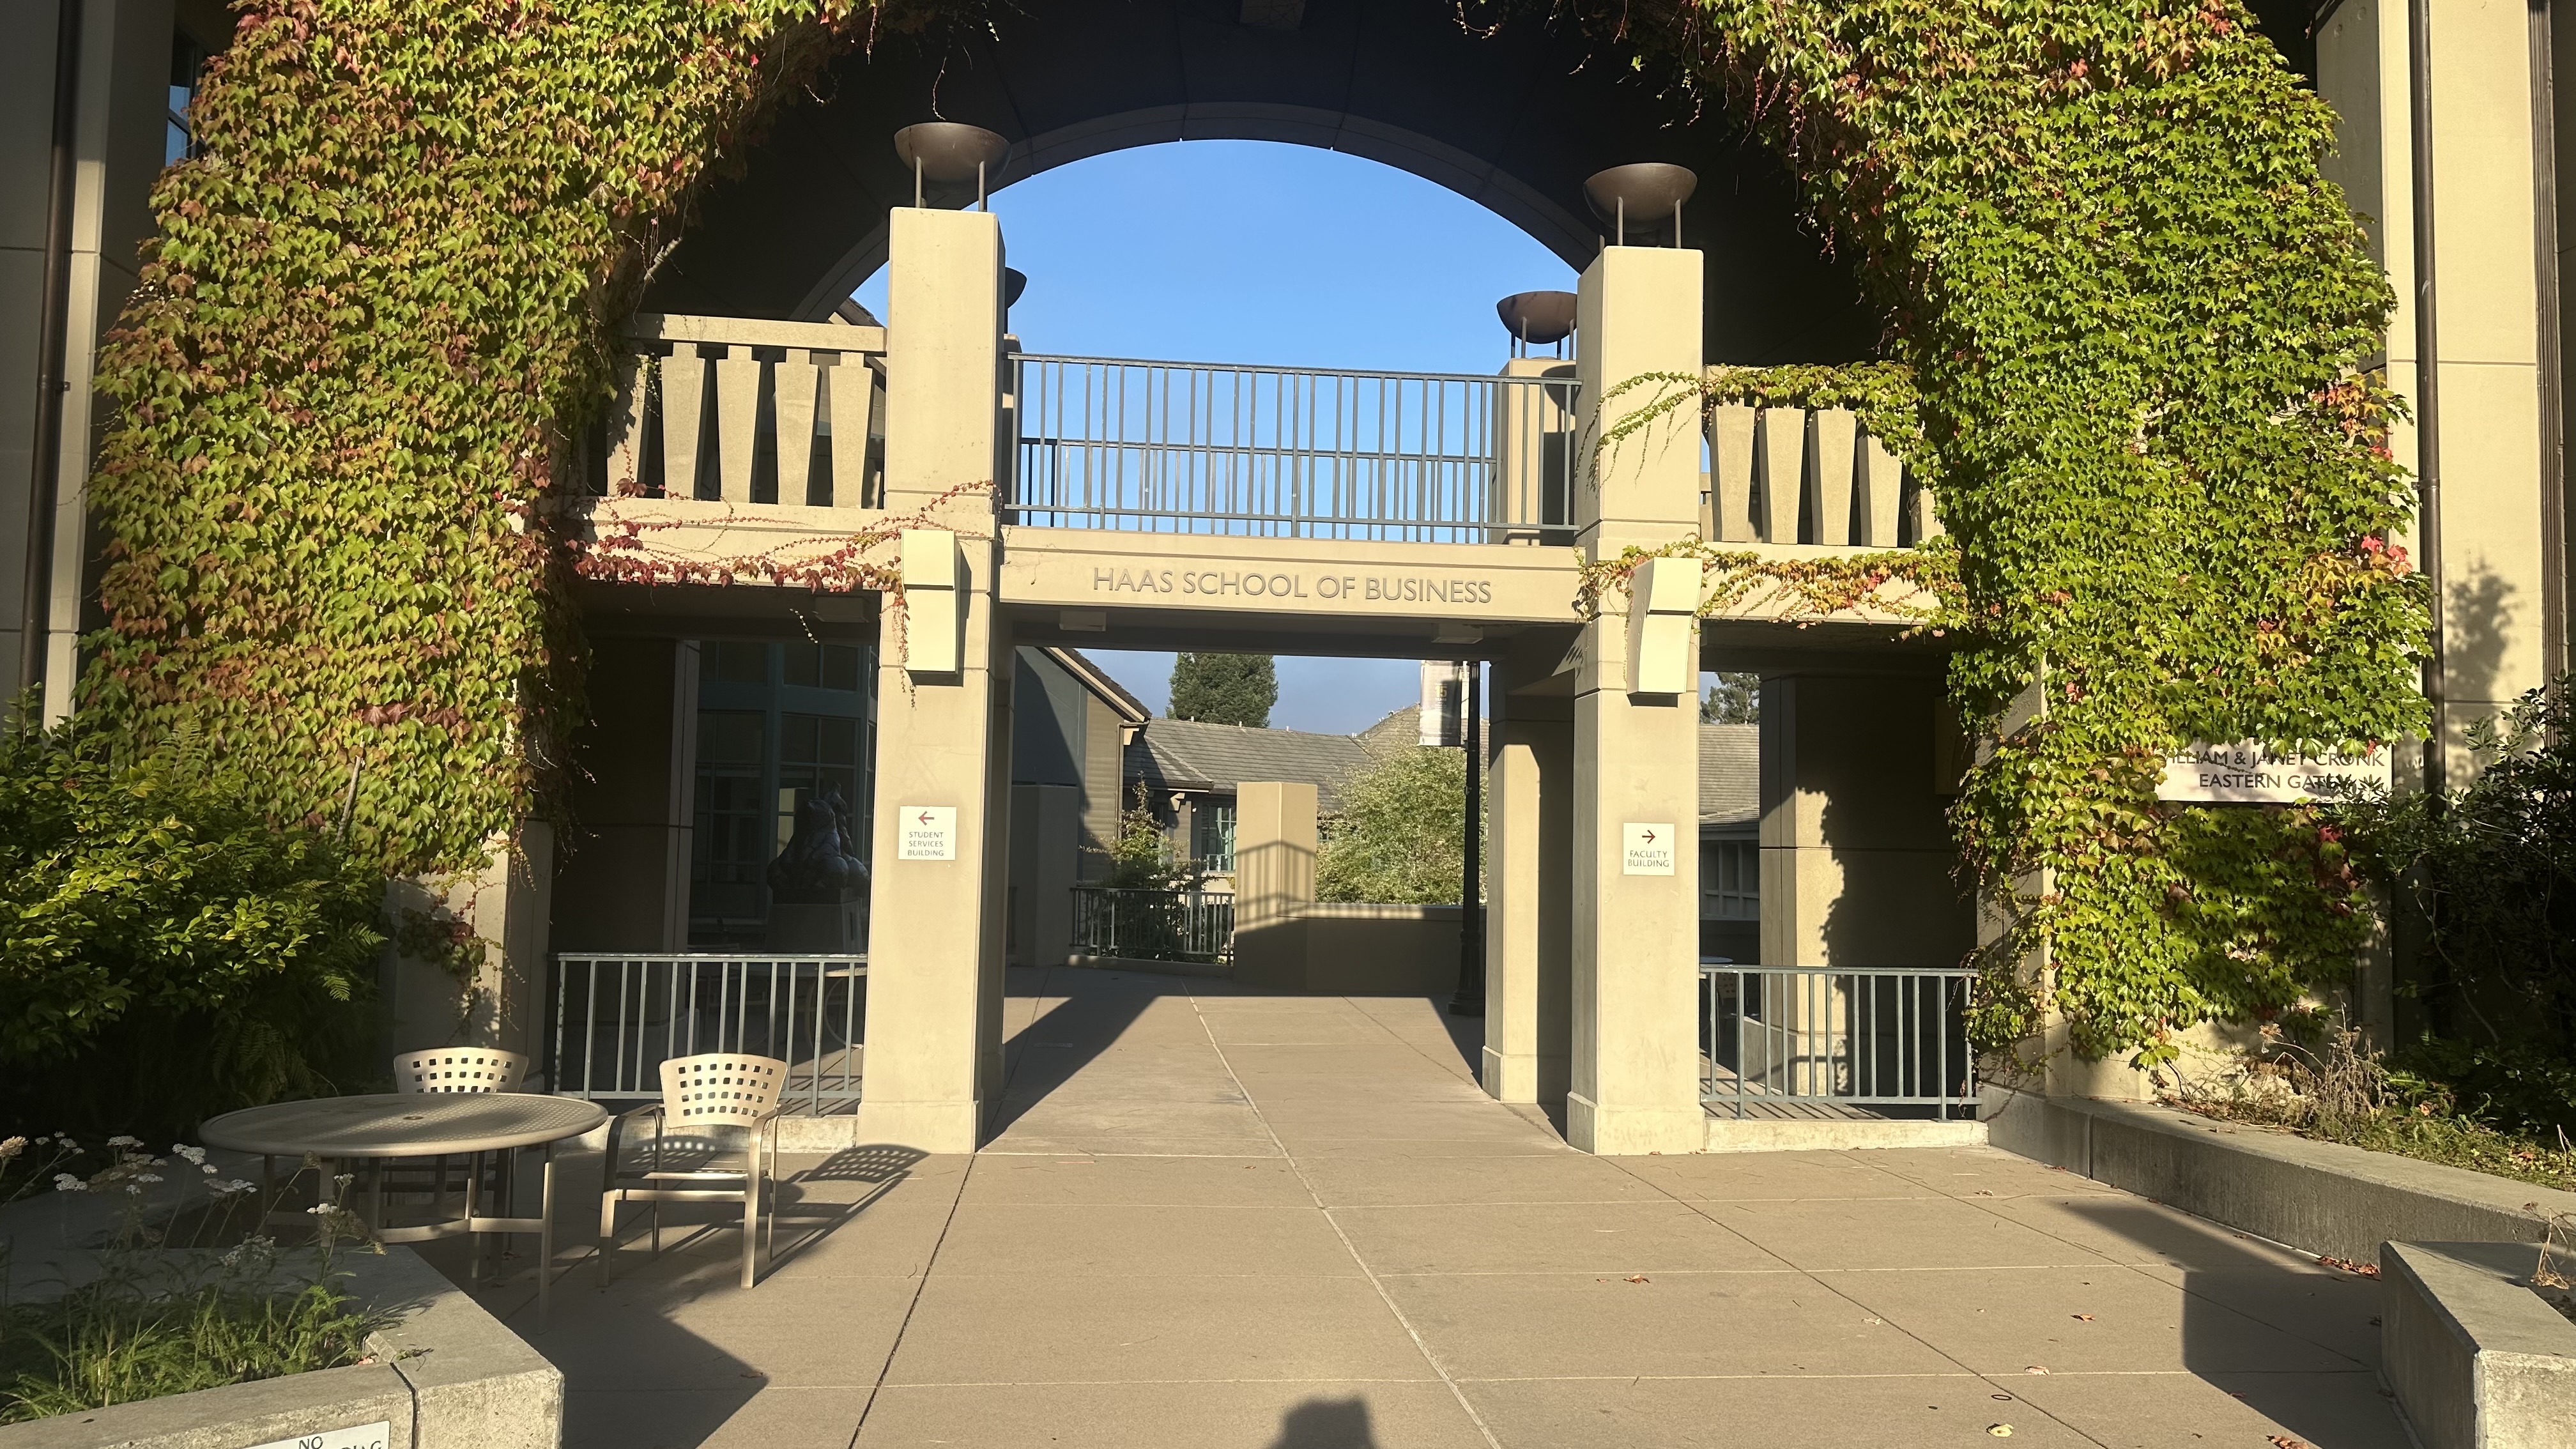
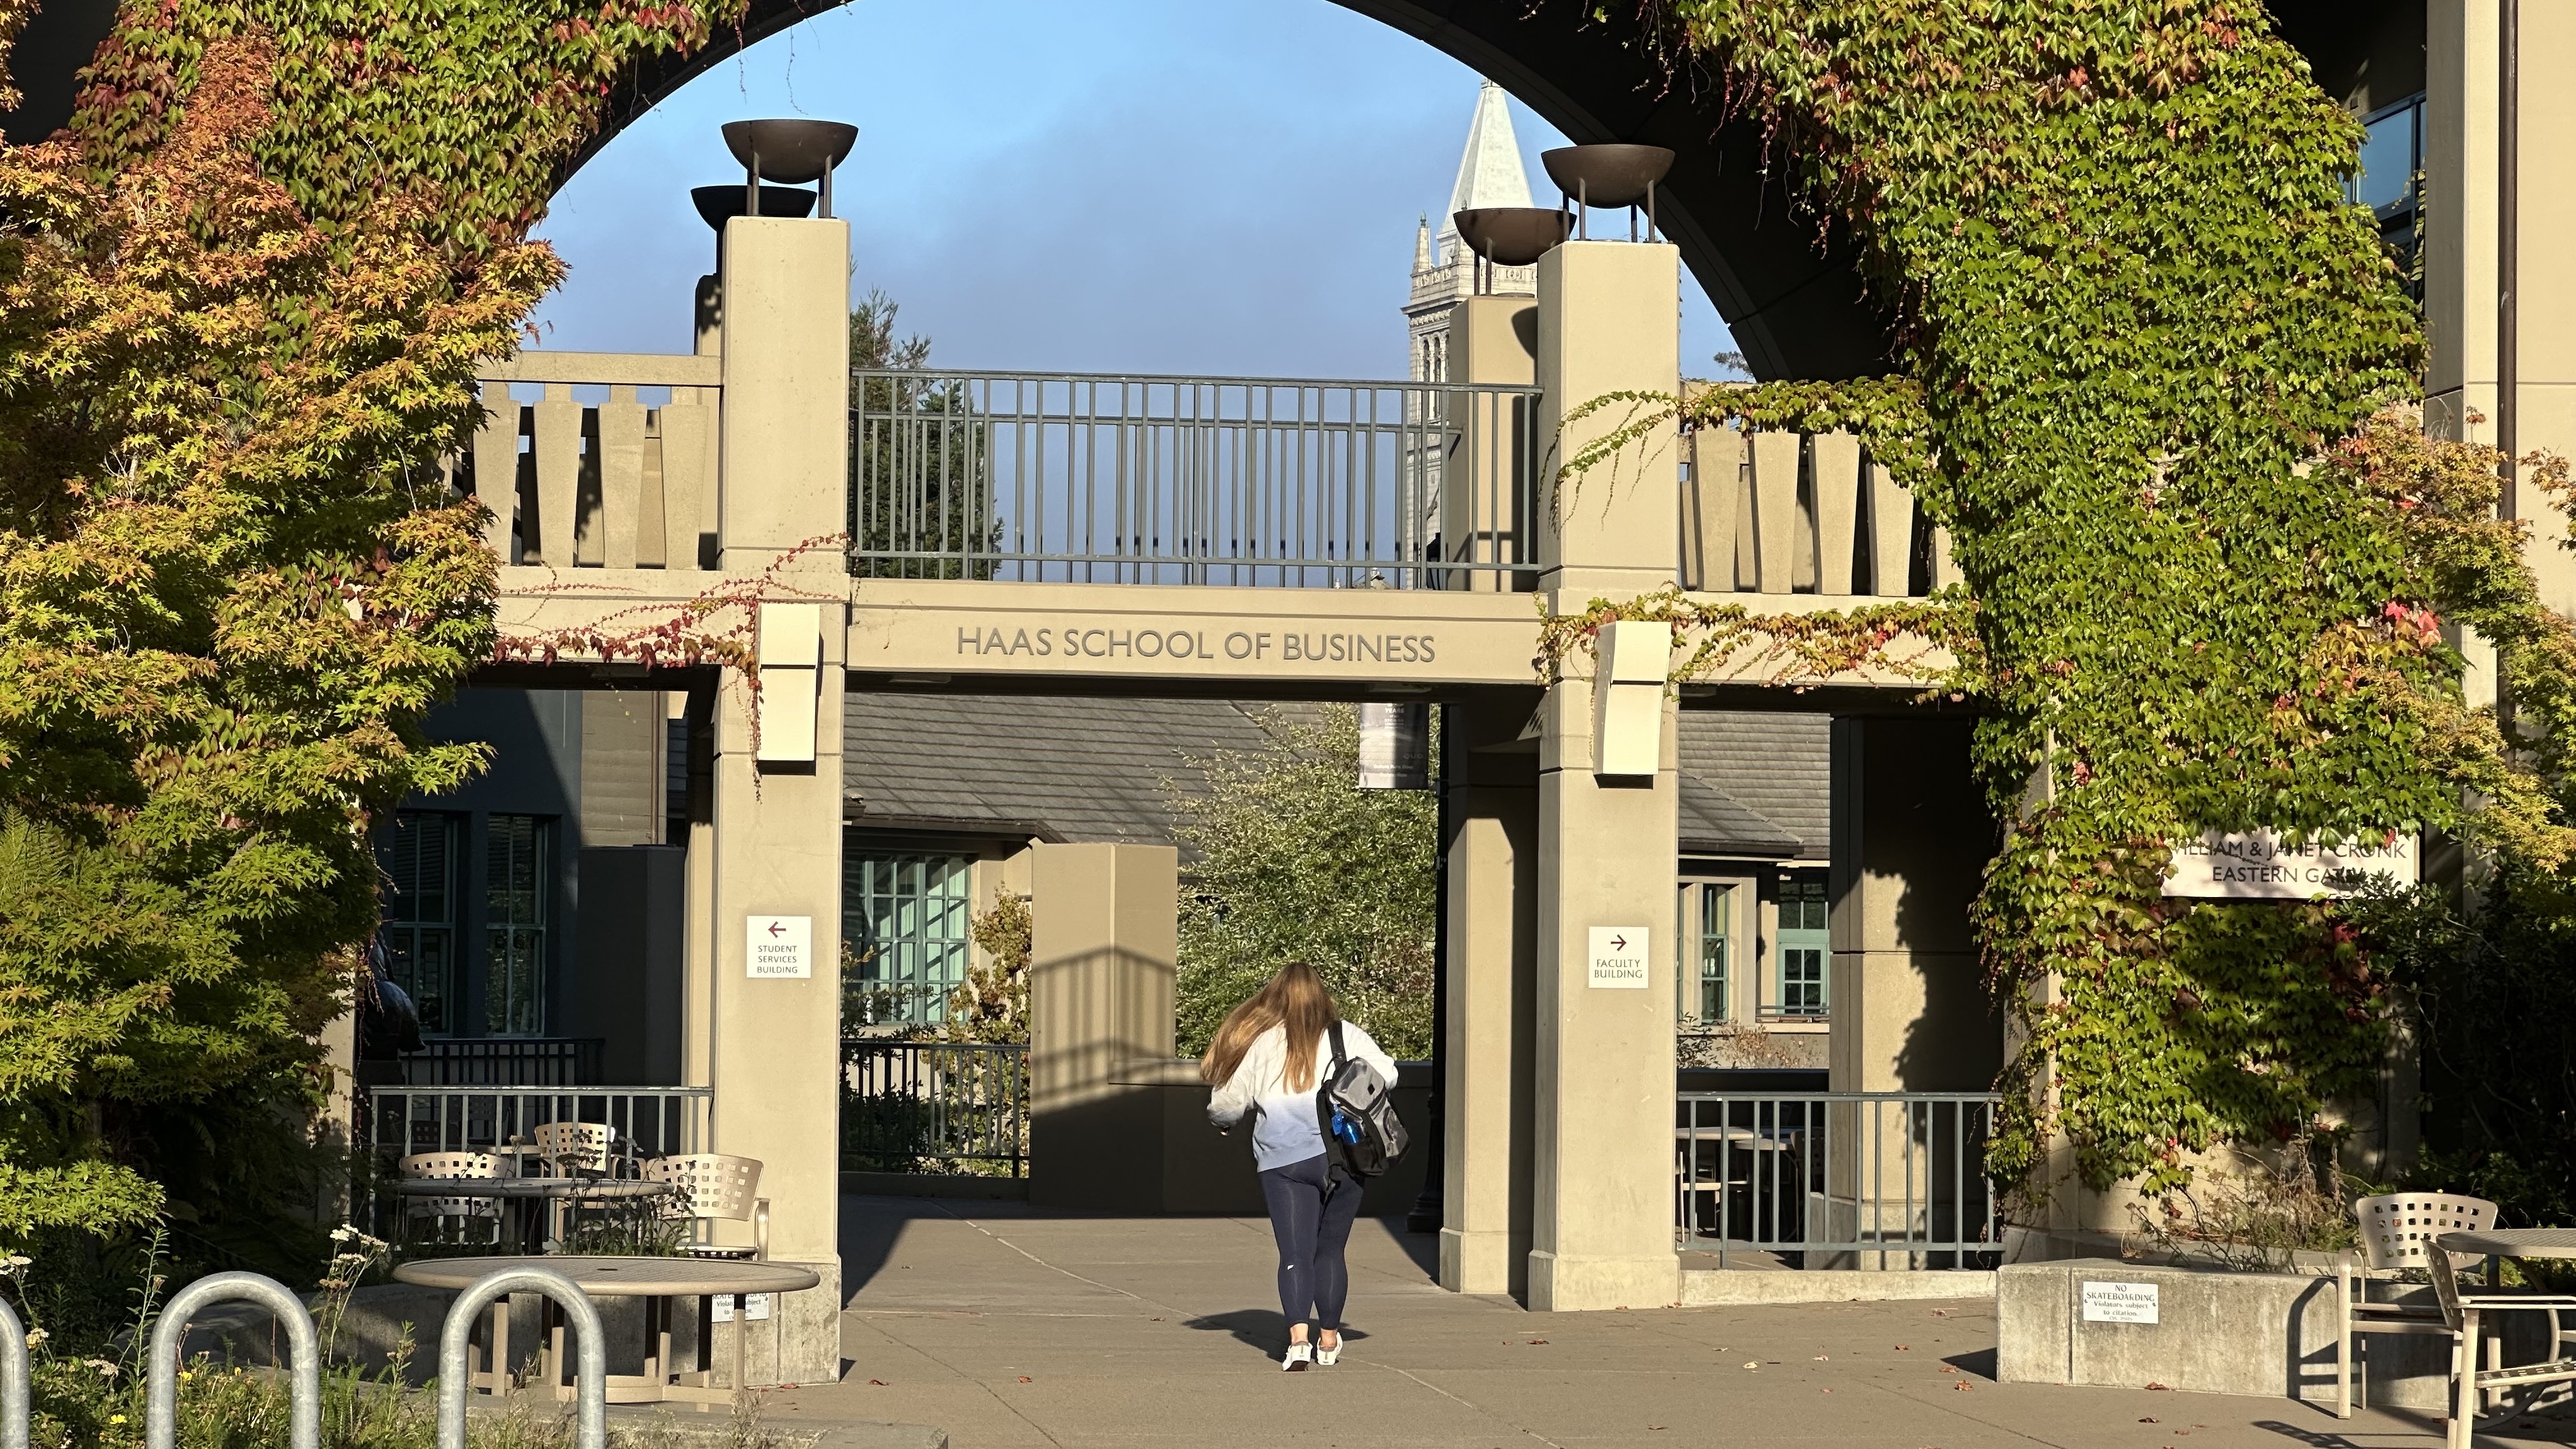
I photographed the Haas School of Business using three different focal lengths. The perspective compression effect is most clearly visible in the buildings surrounding the main "HAAS SCHOOL OF BUSINESS" structure.
With the 0.5x wide-angle lens, we can see much more of the surrounding environment and buildings appear more spread out. However, with the 3x telephoto lens, the background buildings appear much closer and compressed together.
The Dolly Zoom
Vertigo Shot
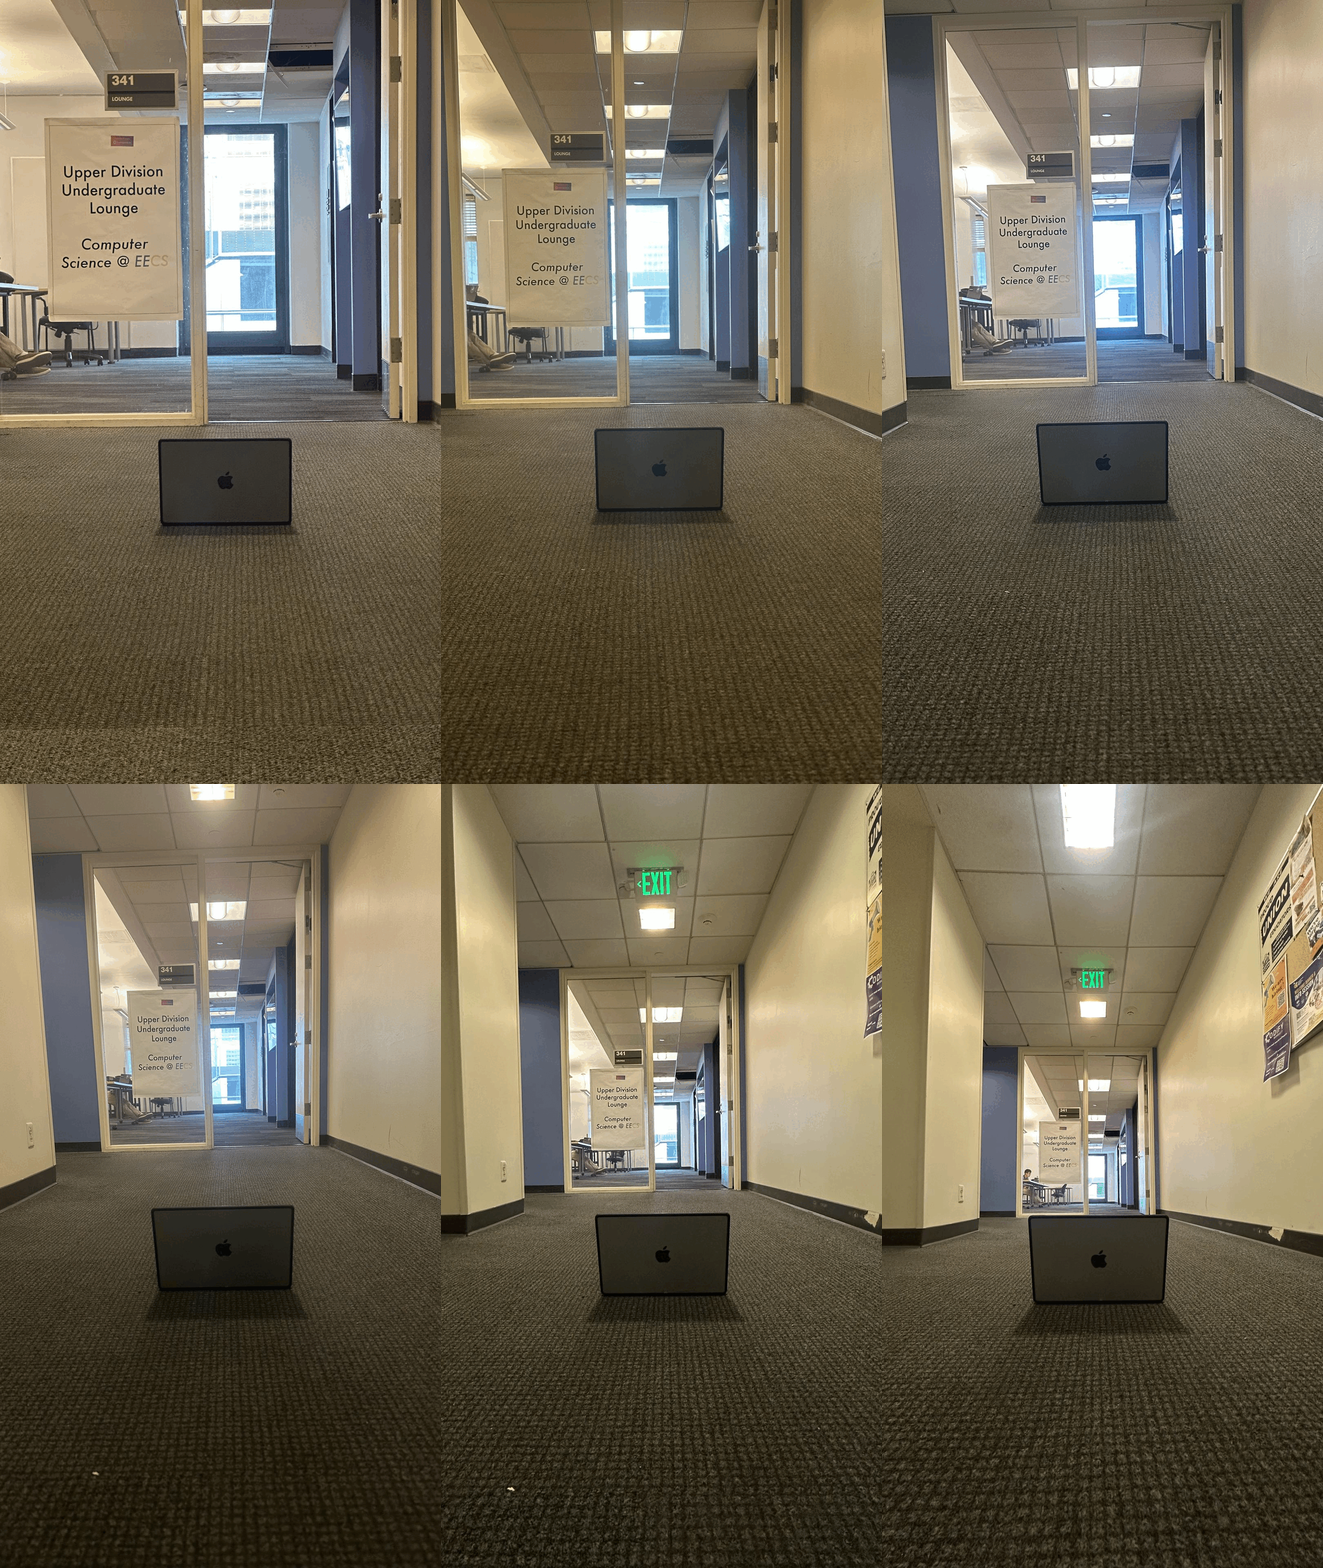
This is a classic cinematographic technique commonly used in films to create dramatic emphasis on a subject while building tension or unease. The effect is actually a practical application of the principles we learned in Parts 1 and 2 - combining focal length changes with camera movement.
The technique involves:
- Moving the camera backward or forward
- Simultaneously zooming in or out proportionally
- Maintaining the subject at the same position and size in frame
Creating a smooth dolly zoom video is technically challenging because it requires precise, synchronized movement of both the camera position and zoom level while keeping the subject perfectly framed. I think this is why for Project 0, we simplify the process by taking multiple still photographs and combining them into a GIF.
I captured this sequence outside the Upper Division Lounge in Soda Hall, using my MacBook Pro as the subject. After shooting five different setups and nearly ninety photos, I finally achieved a satisfying dolly zoom effect!